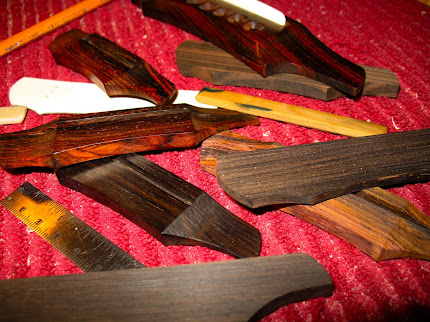
From this to this and so it goes
Fingerboard application and rough/heel prep.....
Neck radius prep and follow thru....
GP
Taking up Quality Space"
Saturday, December 29, 2012
Sunday, December 16, 2012
Side Sound-Port
The owner of that D35 with the side audio port said;
"I think that sound port is awesome, what a difference, I can hear tones that I never heard before from the guitar. You did a great job and your work looks great. Thanks
I think all guitars need a sound port !!! "
Rick
"I think that sound port is awesome, what a difference, I can hear tones that I never heard before from the guitar. You did a great job and your work looks great. Thanks
I think all guitars need a sound port !!! "
Rick
Wednesday, December 5, 2012
Sound-Port Martin D35
This is an 18 year old left-handed Martin D35 that my client requested a side sound-port like he had seen and heard on one of my North Rim models.
This the 4th finished instrument that i've executed a sound-port install. Location was chosen for a number of reasons relating to ease of work, safety with respect to possible internal stress on the side that may cause possible fractures during work, and the fact that you'll all ways not be too far from the bridge for any internal issues relating to future pick-up installs.
Goal to cut a sizable Oval hole, I prefer oval for aesthetics, and install 1/32 or 1/16 birch-ply backing material...
The work proceeds in this manner: The guitar must be clamp firmly in place. Tape the side of instrument for a drawing palette and to protect the instrument and draw the Oval. Then with 1/16 drill bit drill many holes 1/8 in from perimeter of oval. Next I use the StewMac Dremel base with a 1/16 cutter and free-hand cut this interior oval out.
Use tape to support this piece so it doesn't get flung out.
TAKE YOUR TIME
Now prepare the backing material so it has the same hole cut in it as well, hot-glue small cauls onto this backing material. Then dry-fit this with small C-clamps (mine have little round rubber pads on them). If all is well proceed to gluing it in place. I used Old Brown Glue for the job, this is pre-prepared hyde glue and its great stuff. I've used it for three years now. Ounce the backing is in you'll have most of the hard work done. The rest of the job is whatever your comfortable with in removing the side material along with the backing material and taking it the rest of the way to the drawn Oval. I used an 1/8 inch cutter free-hand and home-made dowel sanding rods. Get it very smooth with a round-over then add shellac to pretty it up.
Thats it you now have your own monitor speaker.
later greg
This the 4th finished instrument that i've executed a sound-port install. Location was chosen for a number of reasons relating to ease of work, safety with respect to possible internal stress on the side that may cause possible fractures during work, and the fact that you'll all ways not be too far from the bridge for any internal issues relating to future pick-up installs.
Goal to cut a sizable Oval hole, I prefer oval for aesthetics, and install 1/32 or 1/16 birch-ply backing material...
The work proceeds in this manner: The guitar must be clamp firmly in place. Tape the side of instrument for a drawing palette and to protect the instrument and draw the Oval. Then with 1/16 drill bit drill many holes 1/8 in from perimeter of oval. Next I use the StewMac Dremel base with a 1/16 cutter and free-hand cut this interior oval out.
Use tape to support this piece so it doesn't get flung out.
TAKE YOUR TIME
Now prepare the backing material so it has the same hole cut in it as well, hot-glue small cauls onto this backing material. Then dry-fit this with small C-clamps (mine have little round rubber pads on them). If all is well proceed to gluing it in place. I used Old Brown Glue for the job, this is pre-prepared hyde glue and its great stuff. I've used it for three years now. Ounce the backing is in you'll have most of the hard work done. The rest of the job is whatever your comfortable with in removing the side material along with the backing material and taking it the rest of the way to the drawn Oval. I used an 1/8 inch cutter free-hand and home-made dowel sanding rods. Get it very smooth with a round-over then add shellac to pretty it up.
Thats it you now have your own monitor speaker.
later greg
Saturday, December 1, 2012
Tim's Tenor / Chena Uke
In the process, a Bubinga Tenor Uke
Sitting in the sanding cradle
Neck has carbon fiber rod & epoxy
There is no finish just mineral spirits
Sitting in the sanding cradle
Neck has carbon fiber rod & epoxy
There is no finish just mineral spirits
Subscribe to:
Posts (Atom)
Model/Classic 0 in RoseWood
three piece bk & sound port
E-Chena Uke (Electric)
Rosewood & Myrtlewood/Square neck Resophonic
Resonator lap-slide guit